Create a Vault
A Vault can be used to manage assets and execute transactions while requiring multiple signatures from different owners. A Vault is typically more secure than a single wallet reducing the risk of loss due to a compromised wallet. In this guide we will be walking you through connecting your wallet and creating a vault.
This guide assumes you have an existing wallet with APT to get started.
Getting Started
Navigate to vault.petra.app (opens in a new tab)
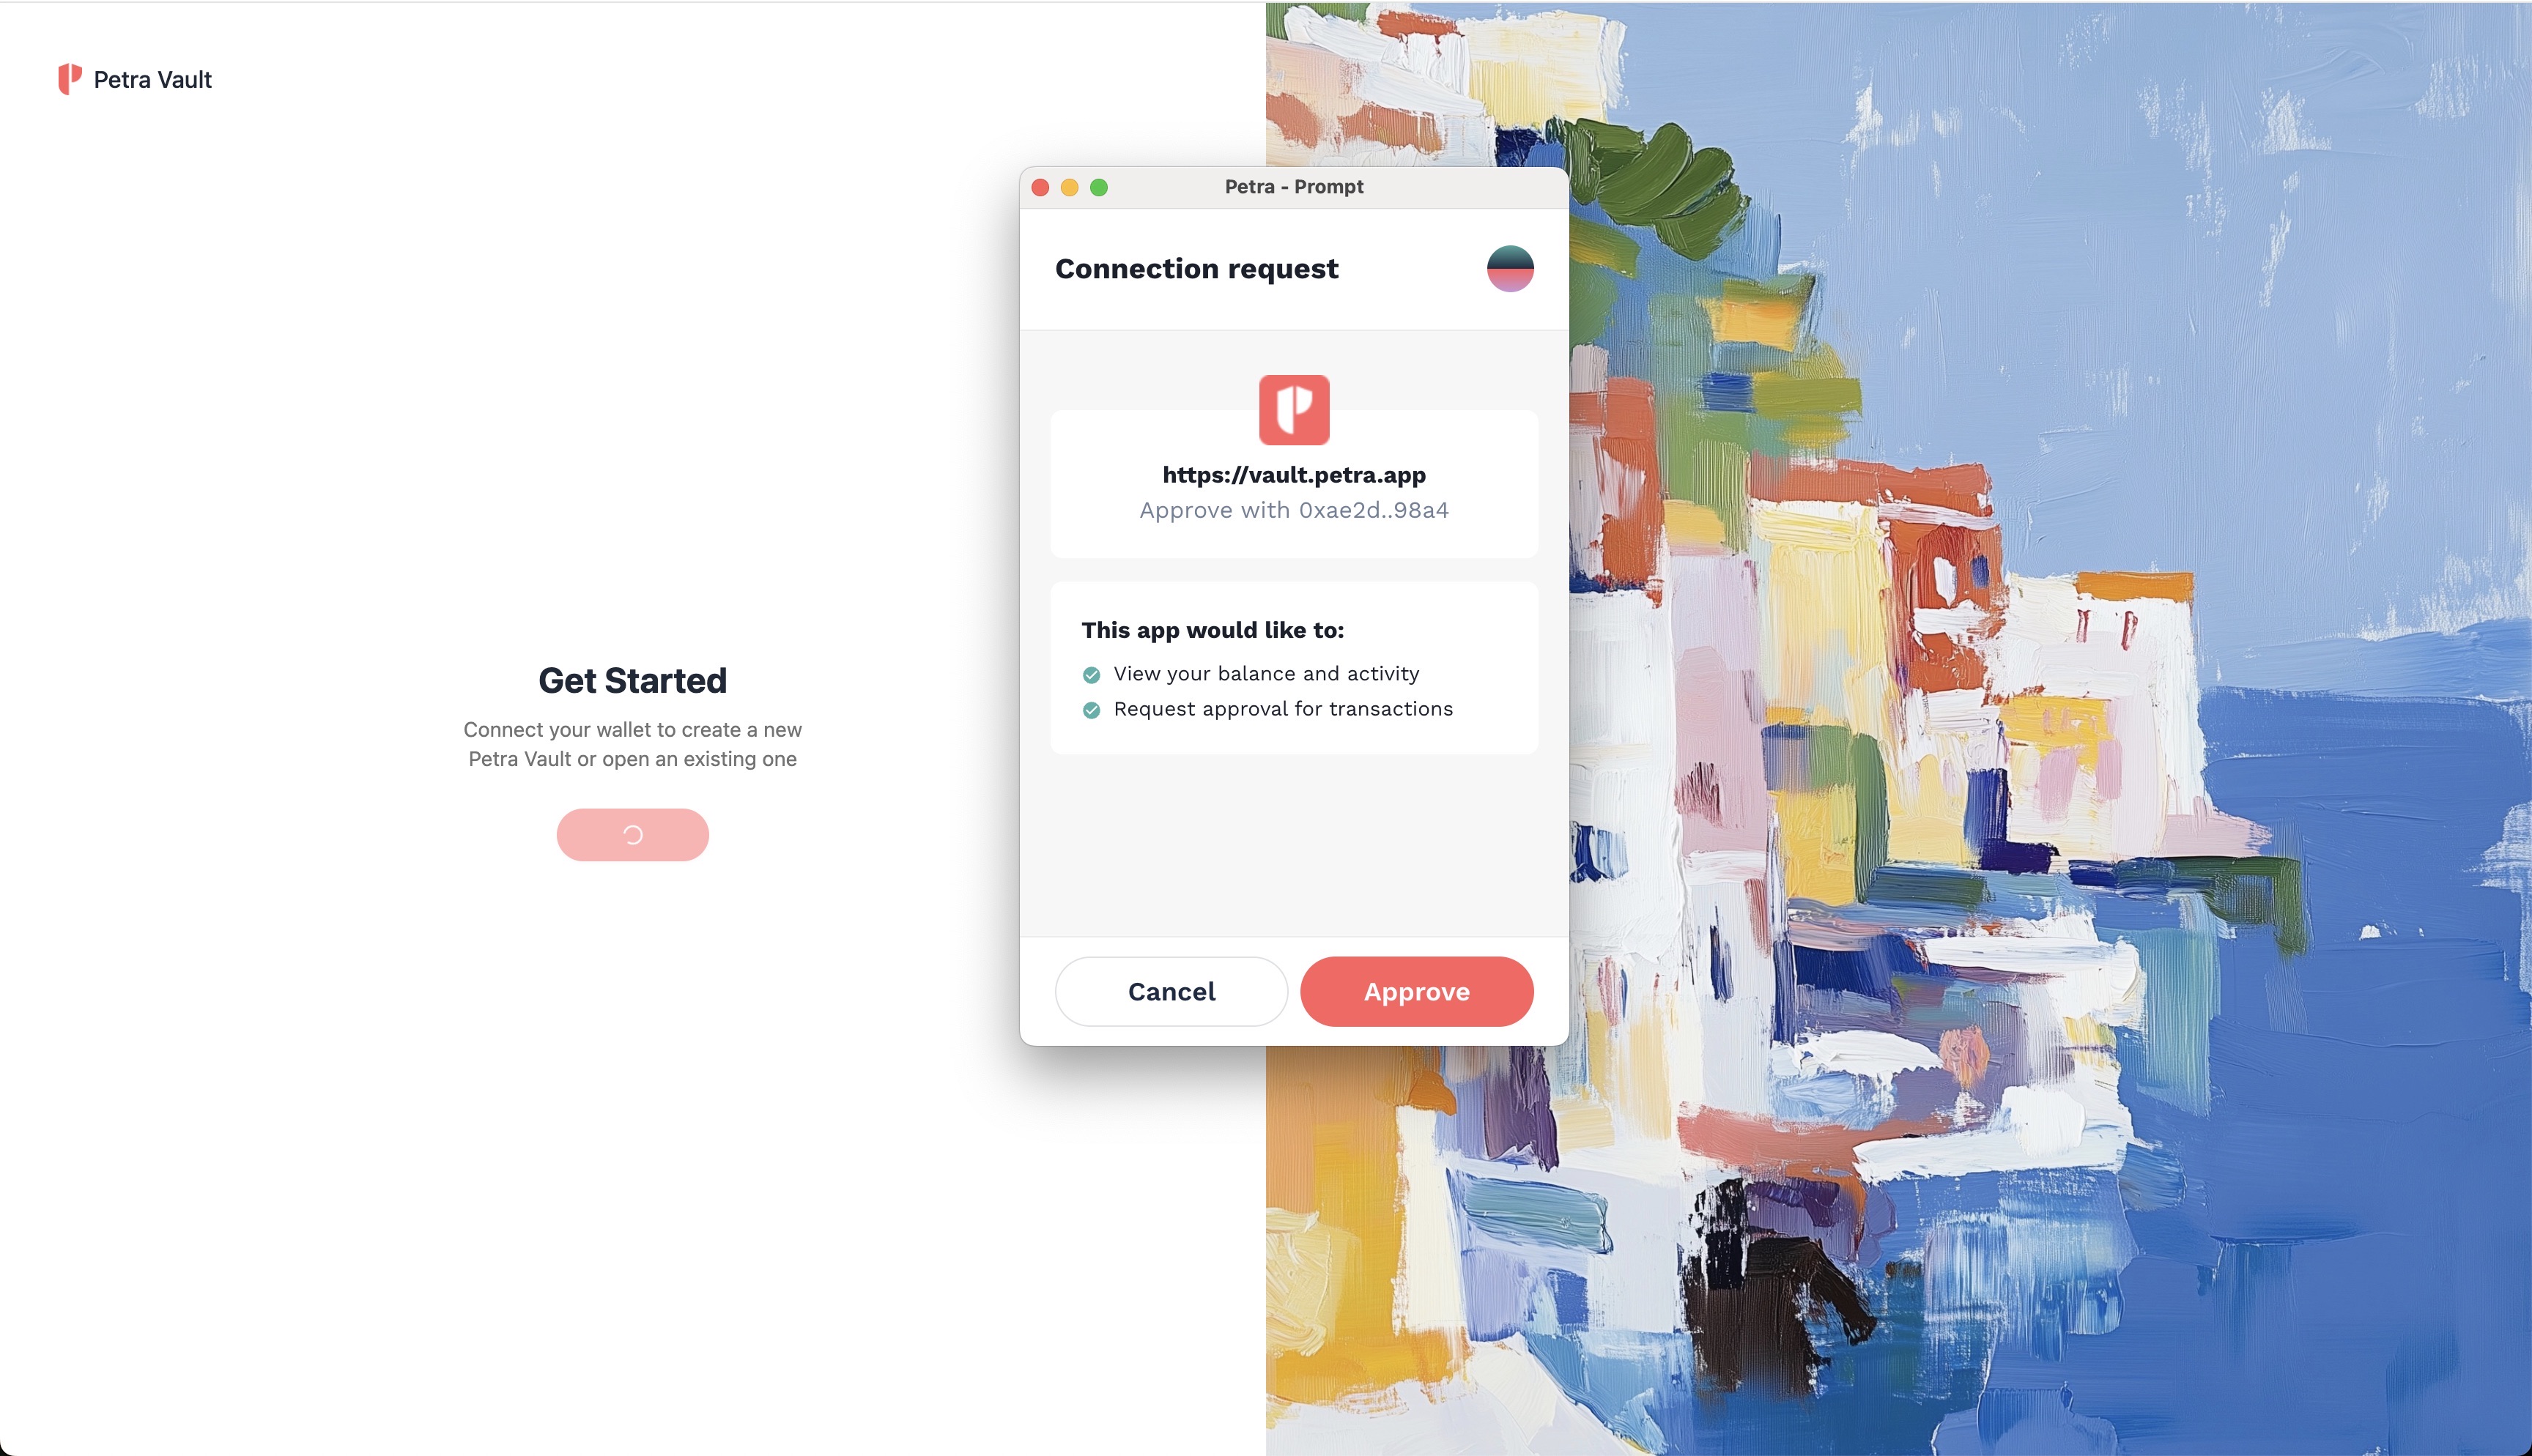
Connect your Wallet
Once you've reached the vault.petra.app (opens in a new tab) homepage, you should see a button to connect your wallet. Click on this button to select your wallet provider.

Select your Wallet Provider
When prompted with a list of wallet providers, select your preferred provider. In this example we will be using Petra Wallet. By selecting your wallet you will be prompted to confirm your connection to Petra Vault.
Name your Vault
Once connected, you will land onto the onboarding page. Here, you can name the vault the name of your choice. Note that this name will not be published onchain and will only be visible on your device.
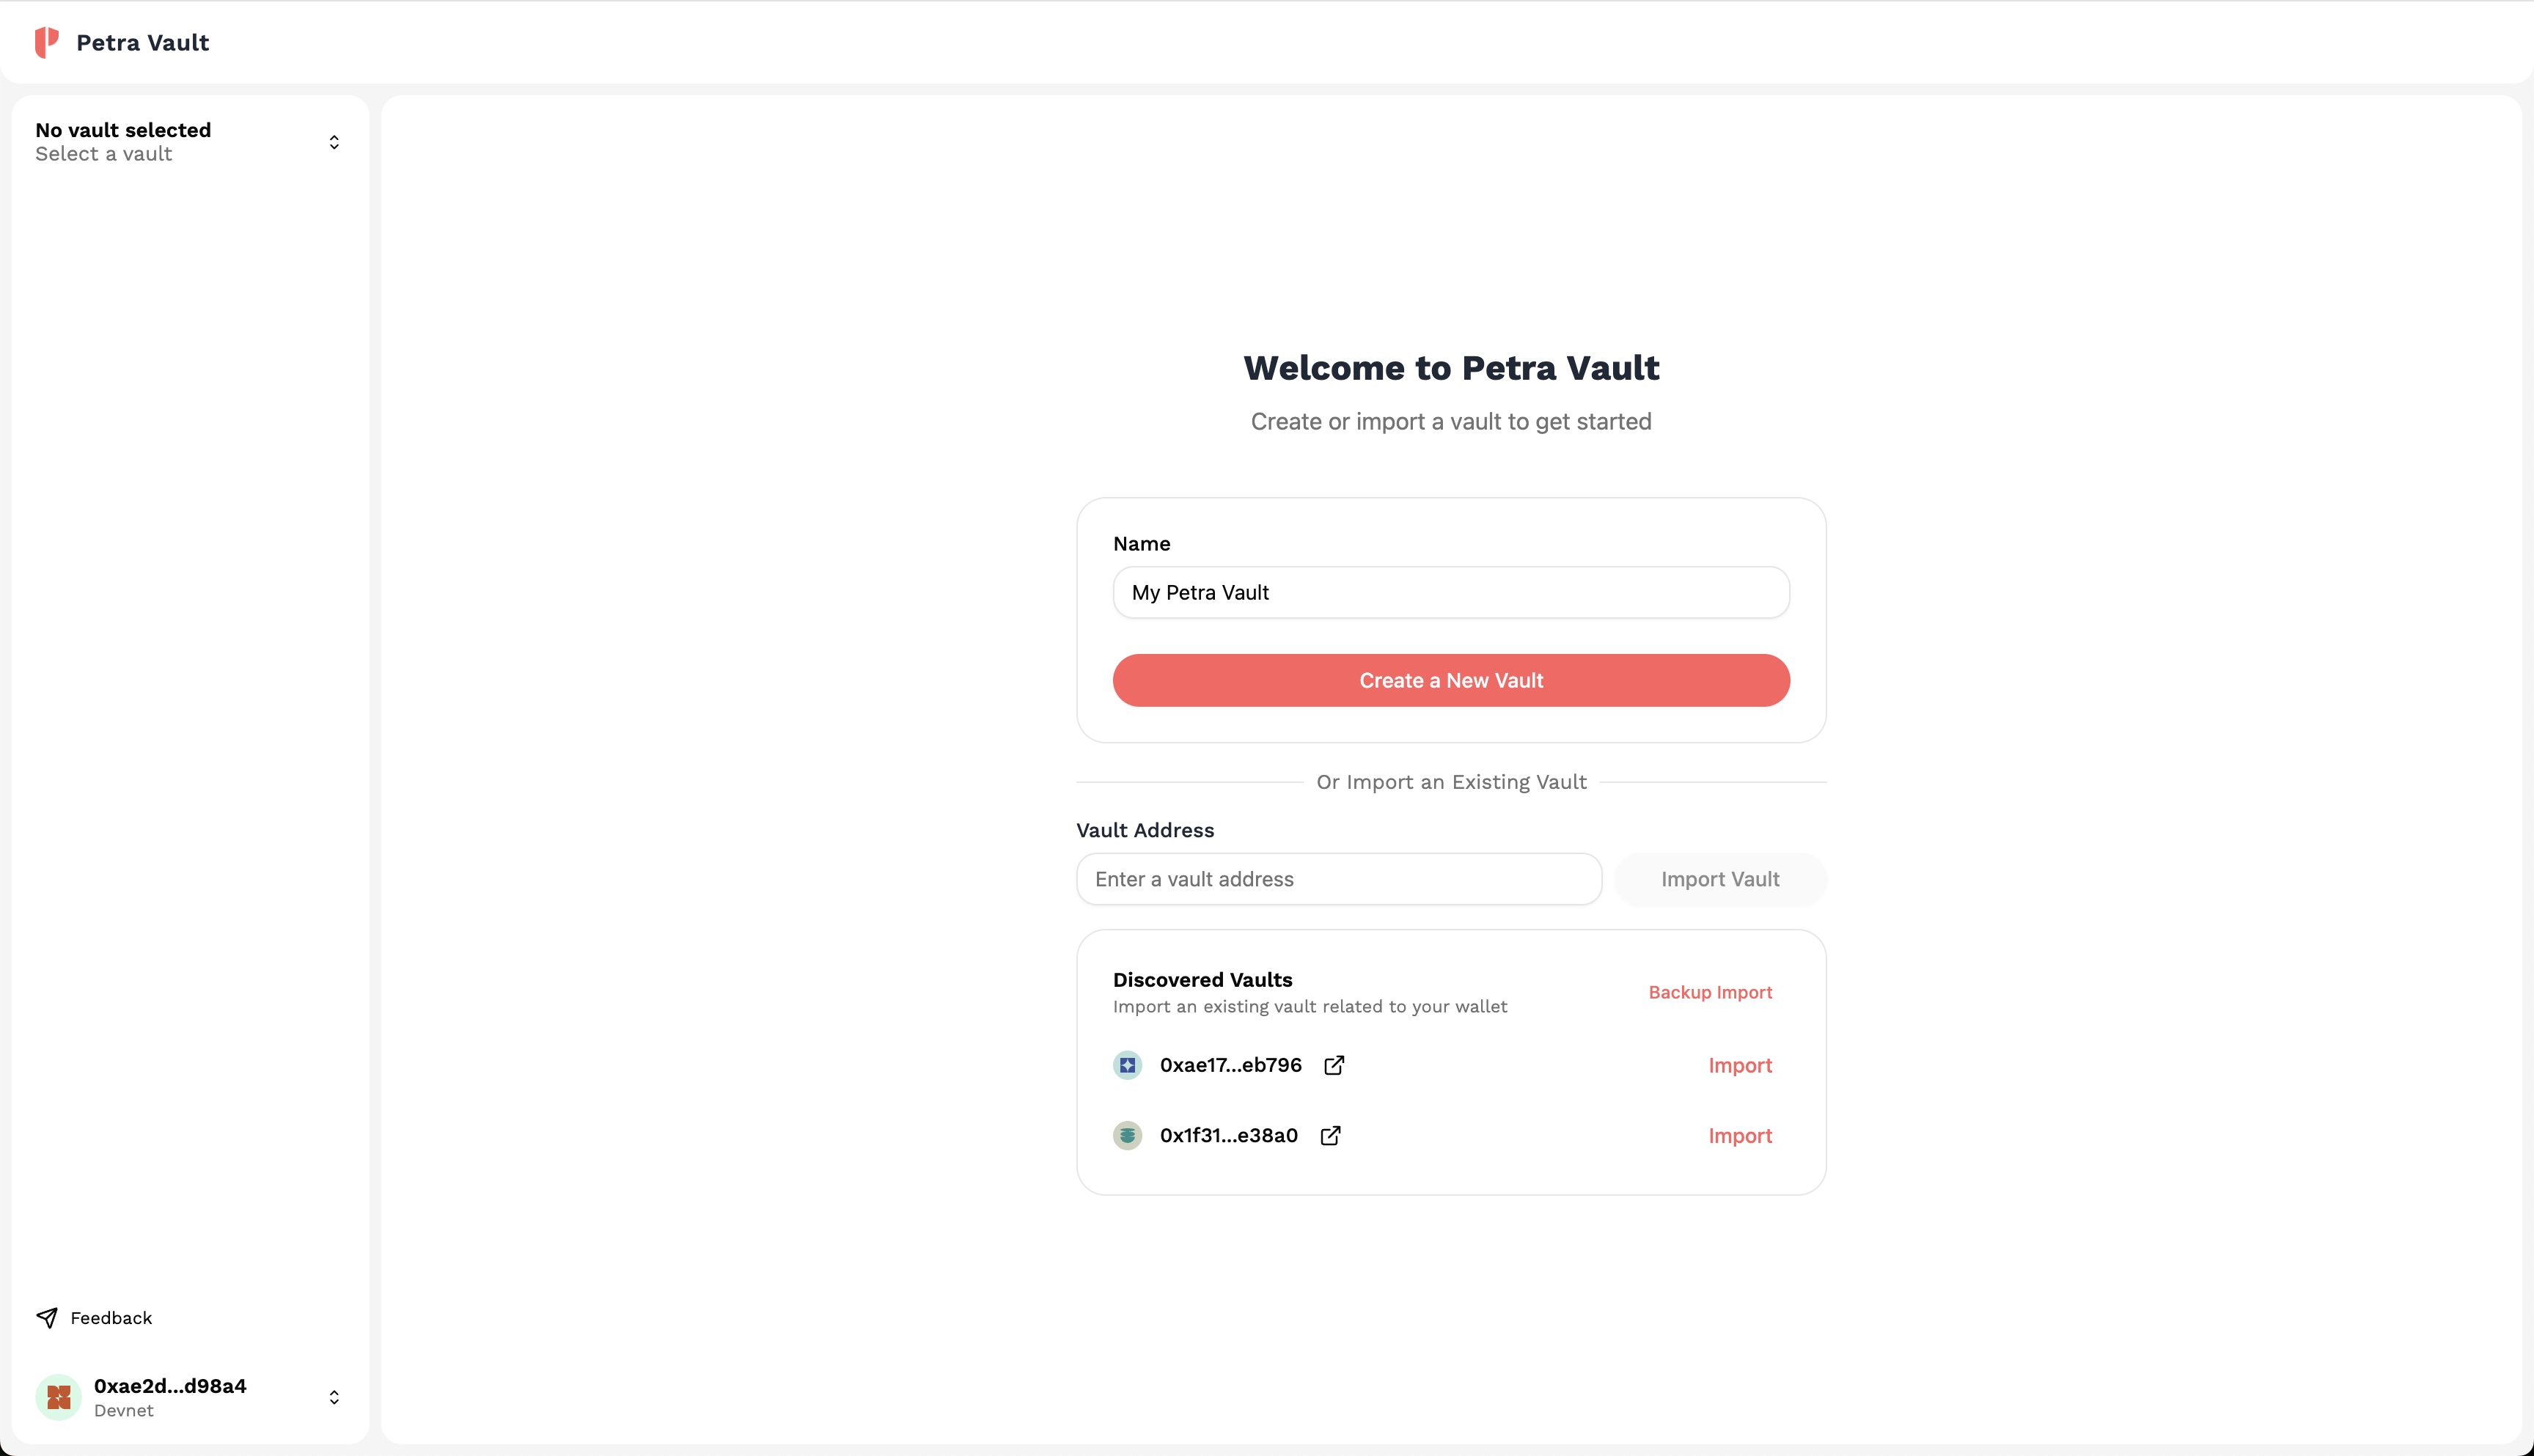
Once you've typed in a good name, click on the Create a New Vault button to set your configurations.
Set your Configurations
You can now attach owners and set your transaction requirements.
- Owners - An owner is a wallet that can propose, vote, execute, or revoke a transaction from the Vault. It is important that you know the owners of the vault so that your Vault is not compromised.
- Signature Requirements - The number of signatures required to execute a transaction. This can be set to any number between 1 and the number of owners.
For this guide, we will leave it at 1 owner and 1 signature.
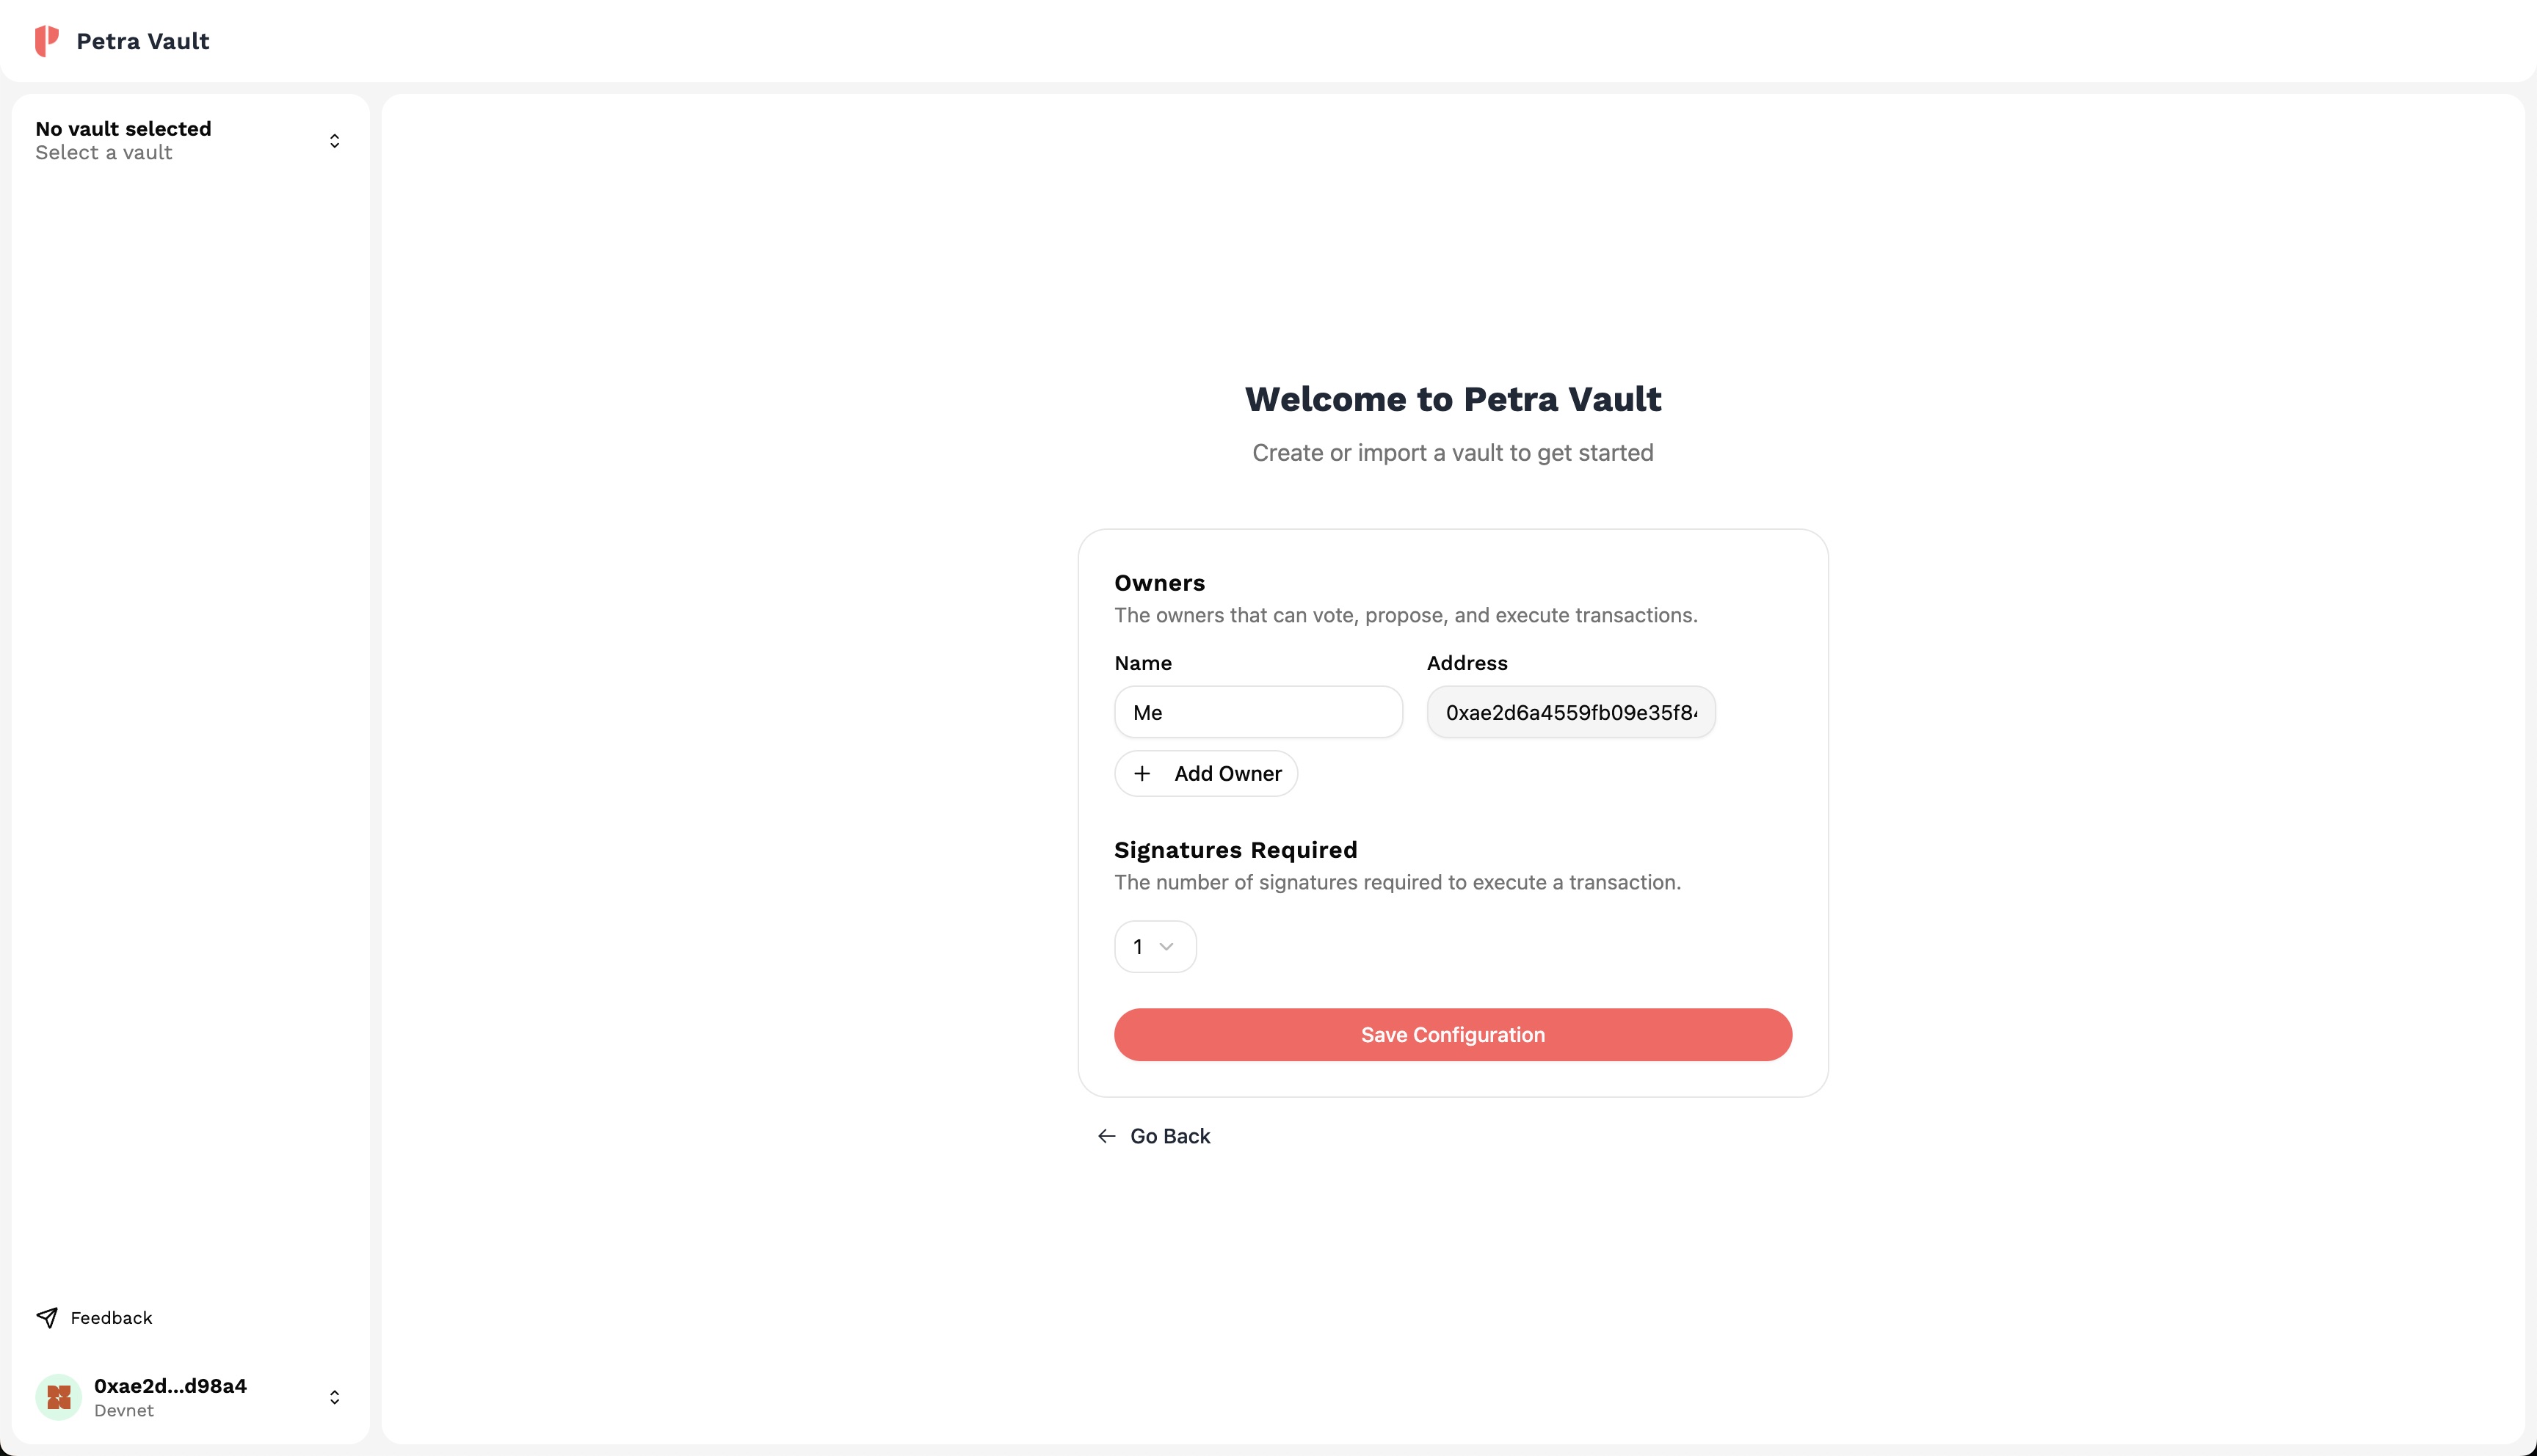
Once you've set your configurations, click on the Save Configurations button to review your configurations.
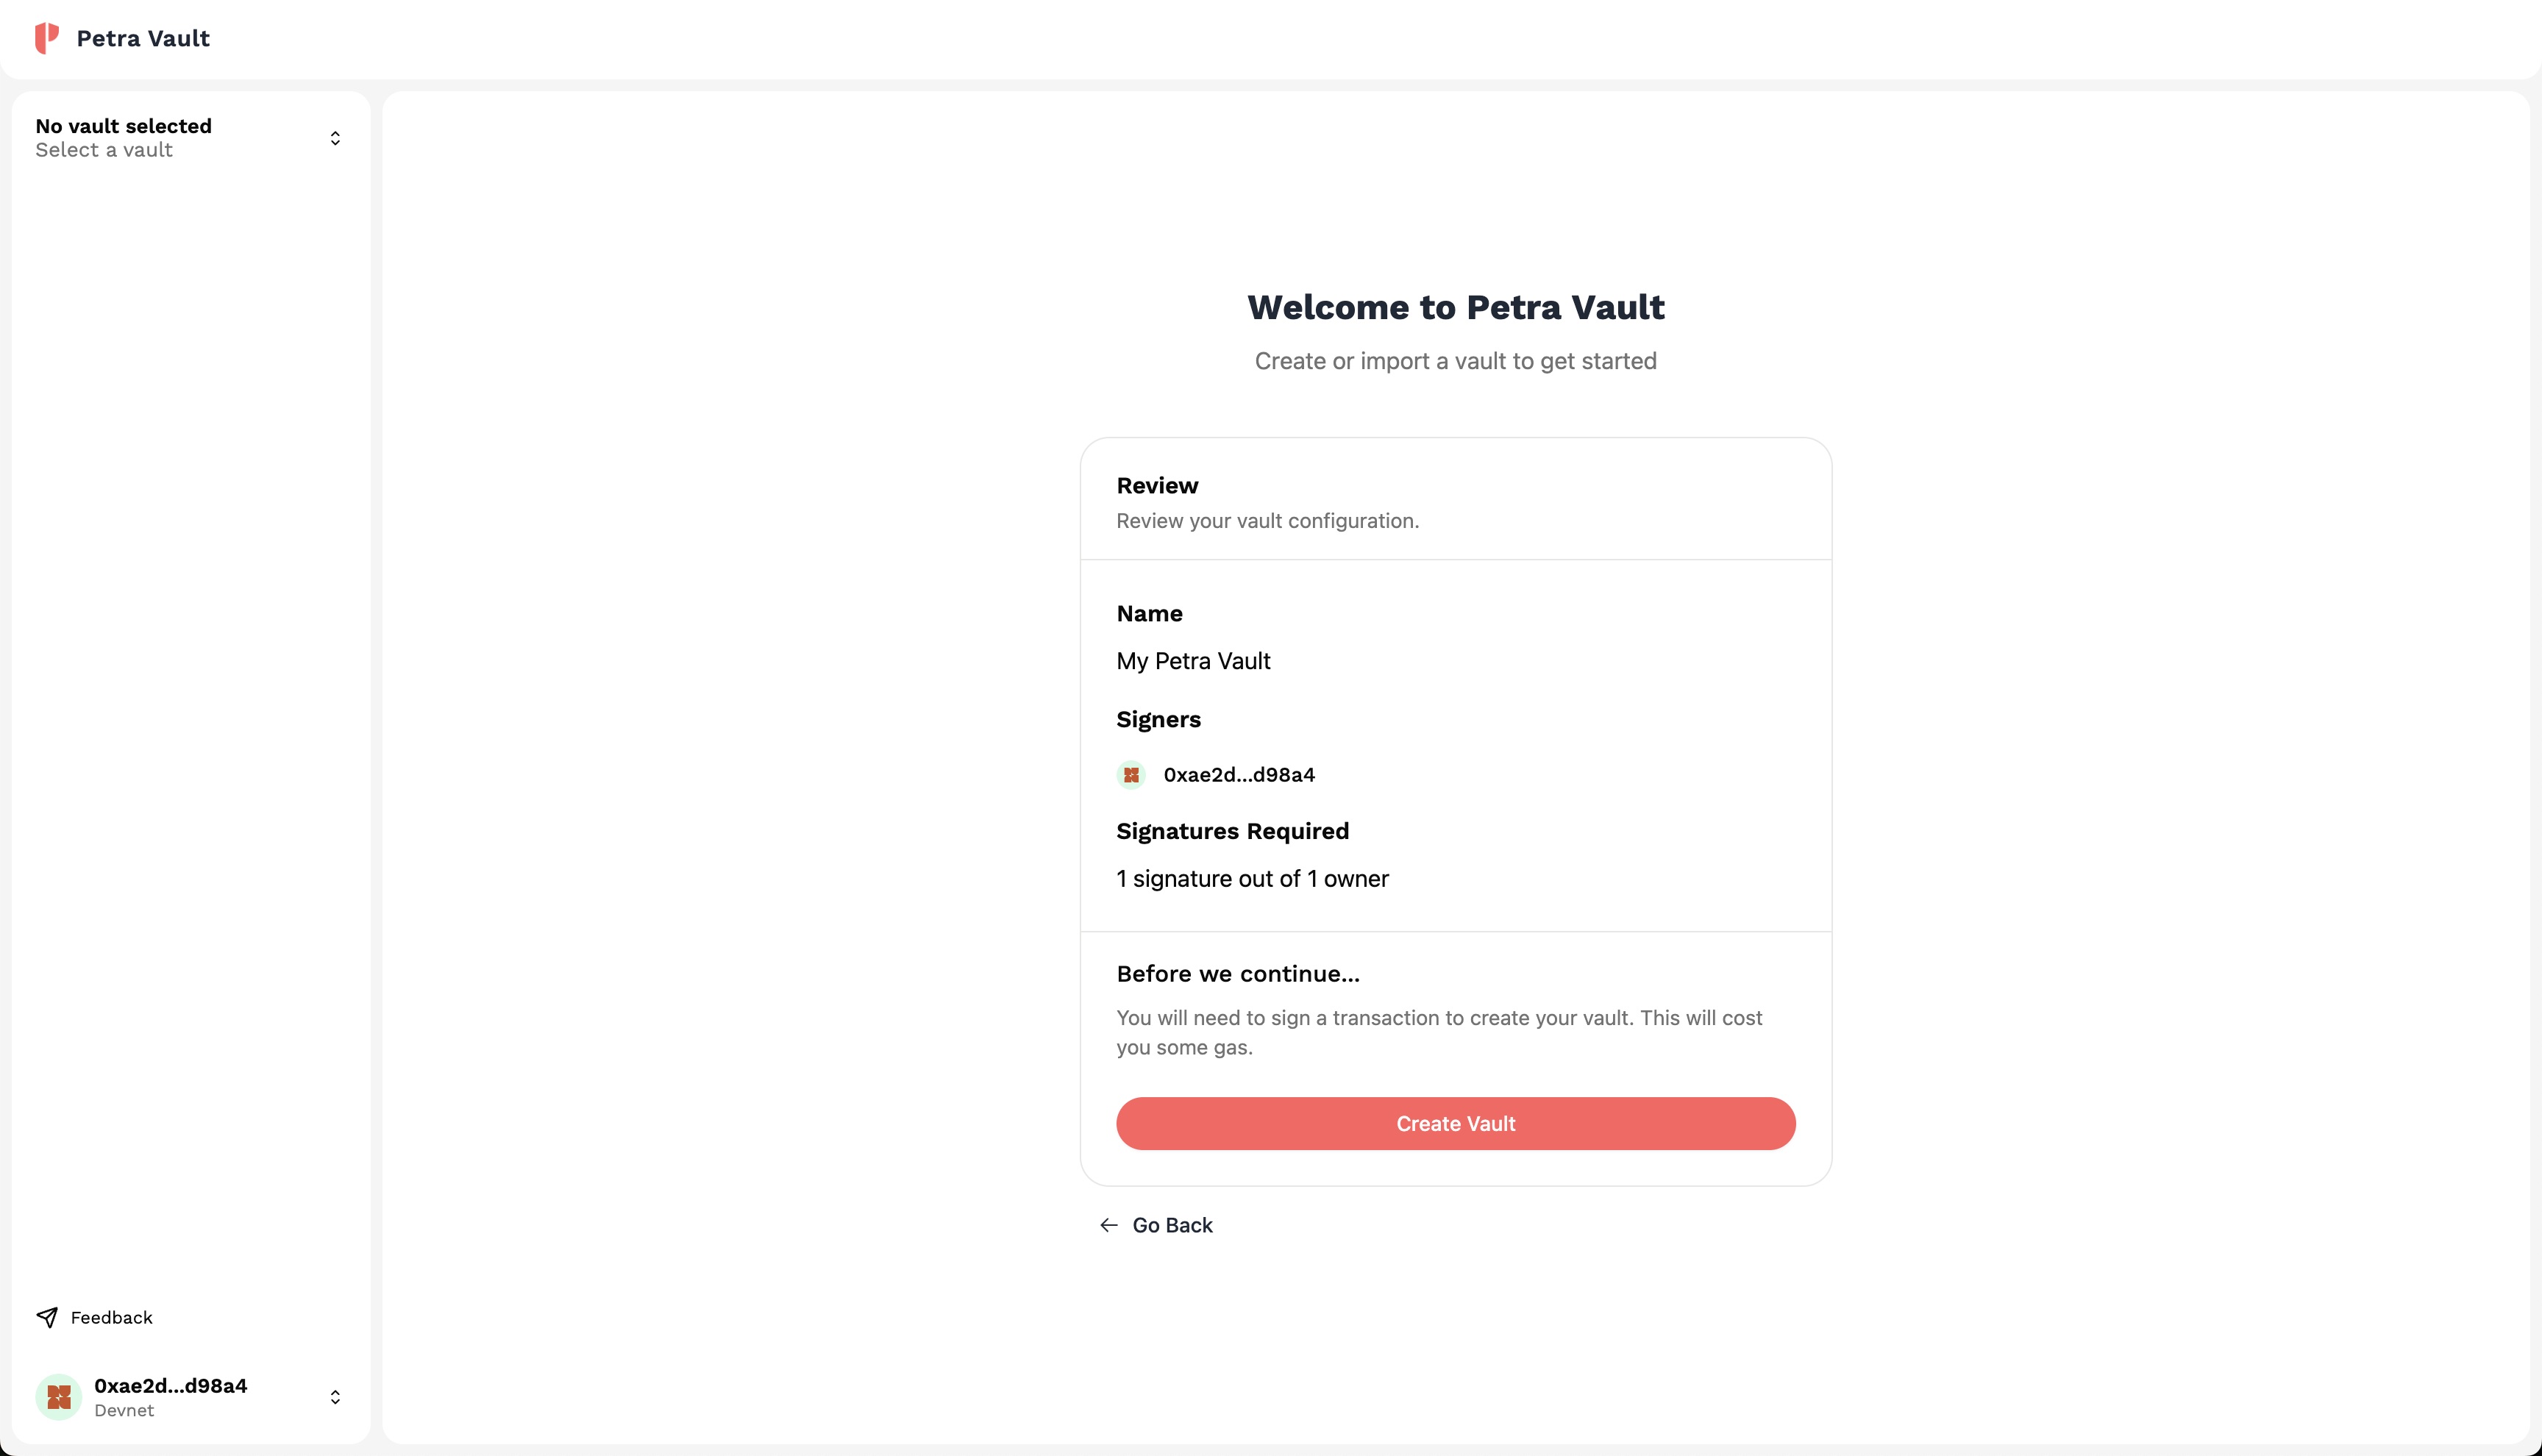
Create your Vault
Review your configurations to ensure that they are correct. Once you're ready, click on "Create Vault" to create your vault. Note that this requires you to sign a transaction with your wallet. This operation requires a small amount of APT to cover the transaction fees.
Success!
Once you've created your vault, you will be redirected to the vault dashboard. Here, you can view your vault's details, assets, and start creating transactions!
